How to Properly Clean Bathroom Mirrors: Complete Guide (2026)
Prices and picks verified as of November 2026. Independent, reader-supported reviews.


Things to Know Before You Buy
- If you want to properly clean bathroom mirrors without streaking, vinegar and distilled water remove soap film and hard-water spots better than most ammonia sprays, and they will not discolor a colored-glass or antique-style mirror.
- Streaks almost always come from wiping in circles or letting liquid air-dry. Straight top-to-bottom passes followed by a dry buff fix both problems.
- Tap water leaves mineral spots once it evaporates, so distilled water matters more than the cleaner you mix it with.
- LED mirrors need the power housing and seams kept dry. A damp cloth, never a wet one, protects the electronics behind the glass.
- A rubber-bladed squeegee clears a large mirror in a single pass and leaves less lint behind than paper towels or old rags.
Knowing how to properly clean bathroom mirrors comes down to the right solution and the right wiping motion, not scrubbing harder or buying a specialty spray. A bathroom mirror collects toothpaste flecks, hairspray mist, and hard-water spots faster than almost any other surface in the house, and the humidity from every shower locks that film onto the glass if you leave it too long. Most of the streaking and clouding you see after a quick wipe-down traces back to one of two habits: using tap water instead of distilled, or circling the cloth instead of pulling it in straight lines.
This guide walks through a five-step method you can finish in about 20 minutes with supplies that cost roughly $12 total, most of which you likely already keep under the sink. It works on a plain frameless mirror, a framed vanity mirror, and the LED-lit mirrors that have become standard in newer bathroom remodels, as long as you keep moisture away from the light housing on the last step. By the end, you will have a mirror that stays clear through steam and daily splashes for days, instead of fogging over again within minutes of putting the cloth down.
What You'll Need
Everything here is inexpensive and reusable, so cleaning bathroom mirrors properly does not require buying a new bottle of specialty spray every month.
- Supplies: white vinegar, distilled water, microfiber cloths
- Tools: spray bottle, rubber-bladed squeegee
Step 1: Clear the counter and dust the glass
Start by moving bottles, cups, and anything else off the counter below the mirror. Wet cleaning around clutter forces you to work around obstacles, and splashed cleaner on a countertop full of products creates a second cleanup job.
Before any liquid touches the glass, dry-dust the whole surface with a clean microfiber cloth or a duster. This clears loose hair, dust, and the gritty film that settles on a bathroom mirror between cleanings, so you are not dragging particles across the glass once it gets wet and scratching it in the process. Skipping this step is the most common reason people fail to properly clean bathroom mirrors on the first pass.
Step 2: Mix a vinegar-and-water solution
Fill a spray bottle with equal parts white vinegar and distilled water. The vinegar's mild acidity breaks down soap scum, toothpaste residue, and the mineral deposits that build up from steam, without leaving the waxy film that some commercial glass cleaners do over repeated use.
Distilled water matters here. Tap water contains dissolved minerals that redeposit on the glass as it dries, which is exactly the hazy spotting you are trying to clean off in the first place. Anyone who wants to clean bathroom mirrors on a regular schedule should keep a labeled spray bottle premixed so this step takes no extra time on cleaning day.
Step 3: Spray and wipe in straight lines
Mist the mirror lightly, section by section, rather than soaking the whole surface at once. A heavy spray runs down the glass and pools along the bottom edge or frame, where it can seep behind the mirror backing.
Wipe with a microfiber cloth in straight top-to-bottom or side-to-side passes instead of circles. Circular wiping redistributes streaks across the same area instead of removing them, and it is the single most common reason a mirror looks clean under one light and streaky under another. This one habit change is often the difference between a mirror that looks clean and one that is properly clean under bathroom lighting.
Step 4: Buff the glass dry with a clean cloth
Switch to a second, completely dry microfiber cloth and buff the surface immediately after wiping, before the solution has a chance to air-dry. Air-drying is what leaves the faint streak patterns you see when sunlight hits the mirror at an angle.
On a larger mirror, a rubber-bladed squeegee pulled in a single downward stroke per section clears the liquid faster than a cloth and leaves almost no lint, which matters if you are trying to clean a large bathroom mirror in one pass. Finish any squeegee pass with a quick cloth buff along the bottom edge, where drips tend to collect.
Step 5: Clean the frame and edges last
Once the glass is dry, wipe the frame, corners, and any decorative trim with a cloth that is barely damp, not wet. Wood and metal frames absorb moisture at the seams, and repeated soaking is what eventually causes warping or a cloudy haze to creep in from the mirror's edge.
If the mirror has a built-in LED light ring, keep liquid away from the power housing and the seam where the light meets the glass entirely. A dry cloth is safer than a damp one on that section, since moisture that reaches the electronics can cause flickering or a dead light strip over time. Finishing the frame last is the step people skip, but it is part of what it takes to properly clean bathroom mirrors with lighting built in.
Common Mistakes to Avoid
The biggest mistake is reaching for an ammonia-based glass cleaner on every mirror by default. Ammonia works fine on plain glass, but it can discolor the silver backing on antique or colored-glass mirrors over repeated use, and it leaves a stronger chemical smell in a small bathroom with poor ventilation than a vinegar solution does.
Paper towels are another common misstep. They shed small amounts of lint onto the glass and can leave faint scratch marks on some mirror coatings over time. A microfiber cloth picks up liquid and debris without leaving fibers behind, and you can wash and reuse it dozens of times before it needs replacing.
Spraying cleaner directly onto the mirror, rather than onto the cloth first, is a third issue, especially on framed or LED mirrors. Overspray runs down behind the frame or into the seam around a light ring, where it can loosen adhesive or reach wiring that was never meant to get wet. Misting the cloth instead of the glass controls exactly how much liquid touches the surface.
Finally, skipping the dry-buff step and letting the mirror air-dry is what causes most of the streaking people blame on their cleaner. The solution itself rarely leaves a mark. The water left behind after it dries does, so the dry-cloth pass in step four is not optional if you want a mirror that stays clear once it dries. People who properly clean bathroom mirrors treat that buffing step as part of the job, not an afterthought.
Our Top Picks
Once your current mirror is spotless, these are the ones we would reach for if it is time to replace it. We compared sizing, frame material, and verified owner reviews across dozens of listings to land on these three.

Editor’s Pick
DUMOS 24"x36" Wall Mirror Bathroom
A frameless rectangular mirror sized for a standard single-sink vanity, with a simple clip-mount install and a low enough price that replacing it is an easy decision.
$36.98
Check Price on Amazon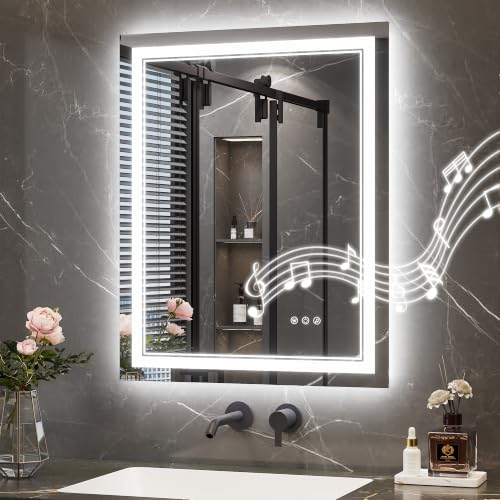
Also Great
Keonjinn 24" x 30" LED
Built-in LED lighting removes the need for a separate vanity light fixture, and reviewers consistently note the brightness is even enough for shaving and makeup application.
$97.99
Check Price on Amazon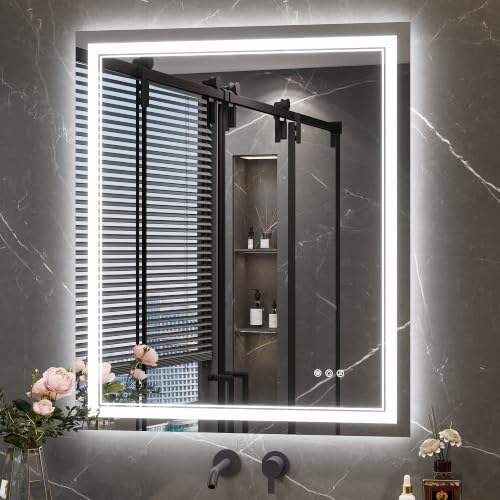
Premium Choice
Keonjinn 30 x 36 Inch
The larger 30-by-36-inch size suits a wide single vanity or a compact double-sink wall, at a price that still lands below most framed alternatives this size.
$189.99
Check Price on AmazonFrequently Asked Questions
What is the best homemade cleaner for bathroom mirrors?
A mix of equal parts white vinegar and distilled water handles soap scum and hard-water spots without leaving the filmy residue that ammonia-based sprays can leave on glass.
Why do bathroom mirrors streak after cleaning?
Streaks usually come from wiping in circles, using too much liquid, or letting the cleaner air-dry instead of buffing it off immediately with a dry microfiber cloth.
Can you use Windex on a bathroom mirror?
Yes, ammonia-based glass cleaners like Windex work on plain glass, but they can discolor or pit mirrors with colored or antique-style backing over time, so a vinegar solution is the safer default.
How often should you clean a bathroom mirror?
Once a week handles normal splashing and toothpaste spatter for most households. A bathroom used by kids or by anyone who showers with the door open may need a quick wipe every two to three days to keep steam film from setting in.
Is vinegar safe on an LED or anti-fog bathroom mirror?
Yes, as long as you mist the cloth rather than the glass and keep liquid away from the light housing and any seams. Owners of LED mirrors report no issues with a vinegar-and-water mix applied this way.
Verdict
Learning how to properly clean bathroom mirrors takes five steps and about $12 in supplies you can reuse for months: clear the counter, mix a vinegar-and-water solution, wipe in straight lines, buff dry immediately, and finish the frame last. Skip the ammonia spray and the paper towels, and the streaking most people fight with disappears on its own. If your current mirror has reached the point where cleaning no longer helps, because the glass is pitted, the silver backing has started to flake, or the frame has warped from years of trapped moisture, the DUMOS 24-by-36-inch frameless mirror above is a straightforward, inexpensive replacement sized for a standard single-sink vanity. For a bathroom that needs built-in lighting instead, the Keonjinn LED options cover both a compact vanity and a wider double-sink wall. Whichever mirror you end up with, the same five-step routine keeps it clear.